
Mastering Knife Sharpening Techniques for a Razor-Sharp Edge
by Marco Castro on Feb 14, 2026

So, you've got a knife that's seen better days, right? Maybe it's been a while since it could slice through a tomato without squishing it, or perhaps you're just tired of struggling with dull blades. Learning proper knife sharpening techniques isn't some secret club for chefs or survivalists. It's a practical skill that makes a huge difference, whether you're chopping veggies for dinner or working on a project. This guide is here to walk you through it, step-by-step, so you can get that satisfyingly sharp edge back on your favorite tools.
Key Takeaways
- A sharp knife is safer and more effective than a dull one, making tasks easier and reducing the risk of slips.
- Understanding the parts of a knife edge, like the bevels and apex, helps in sharpening effectively.
- Choosing the right tools, such as whetstones of varying grits and a leather strop, is important for good results.
- Consistent angle and pressure, along with alternating sides during sharpening, create a balanced and durable edge.
- Regular maintenance, like honing and proper storage, keeps your knife sharp longer between full sharpening sessions.
Understanding The Fundamentals Of Knife Sharpening
Why A Sharp Edge Matters
A sharp knife isn't just about convenience; it's about safety and efficiency. When a knife is dull, you have to push harder to make it cut. This increased force makes it much easier for the knife to slip, potentially causing injuries. A sharp blade, on the other hand, slices through materials with less effort and more control, making your tasks safer and more enjoyable. Think about chopping vegetables for dinner or preparing firewood; a sharp knife makes these jobs quicker and less tiring. It also helps preserve the knife itself. Regular sharpening removes less metal over time compared to forcing a dull blade, which helps your knife last longer.
Decoding The Anatomy Of A Knife Edge
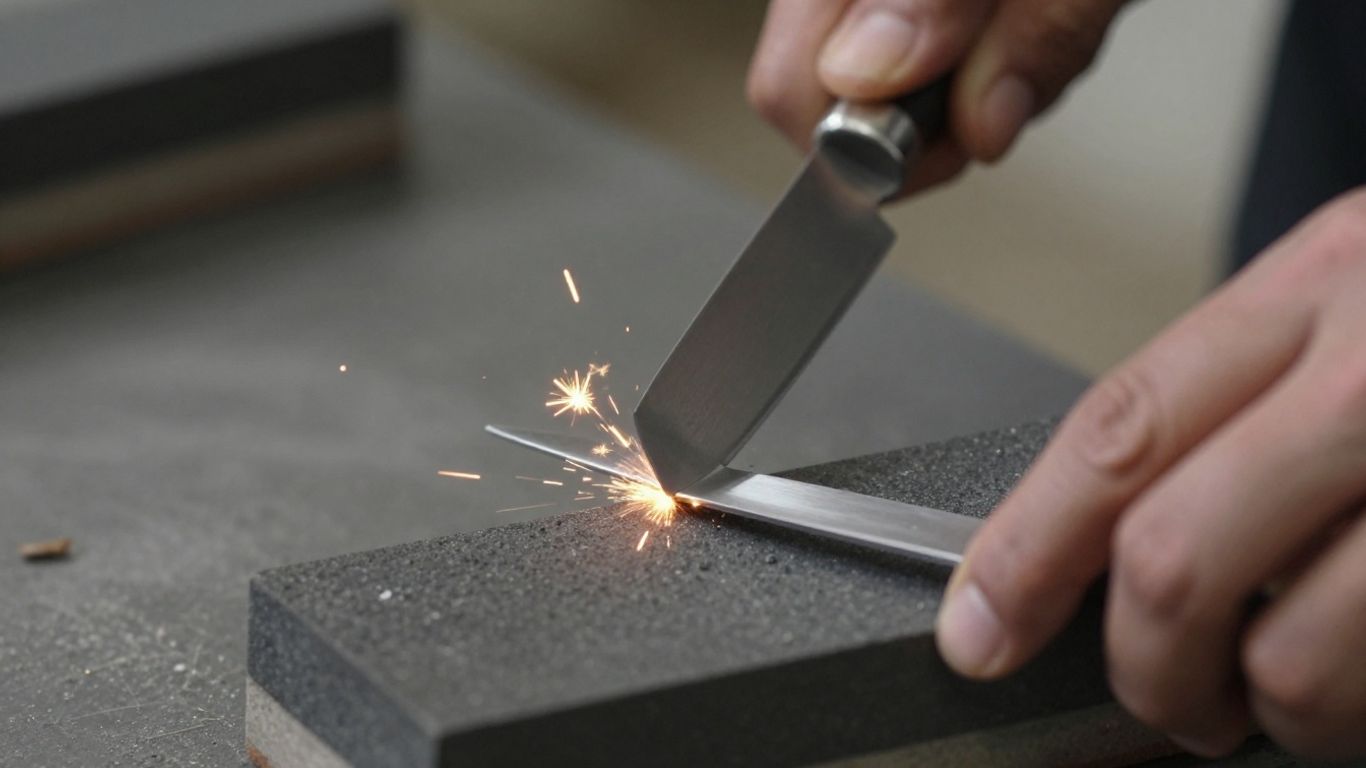
To sharpen a knife well, it helps to know what you're working with. The edge of a knife isn't just a flat surface; it's made up of tiny angled sections that meet at the very tip, called the apex. These angled surfaces are known as bevels. When you sharpen a knife, you're essentially refining these bevels to create a fine, sharp apex. As you work one side of the edge, a tiny bit of metal can fold over to the other side, creating what's called a burr. This burr is a sign that you're getting close to a sharp edge, and removing it is a key part of the sharpening process. Understanding these parts helps you know what to aim for when you're sharpening.
Essential Sharpening Terminology Explained
Getting familiar with a few terms will make sharpening much clearer. You'll hear about the "angle" – this is the specific degree at which you hold the knife against the sharpening surface. Different knives work best at different angles, often between 15 to 20 degrees. The "grit" of a sharpening stone refers to how coarse or fine it is; lower numbers mean a coarser stone for reshaping, while higher numbers mean a finer stone for polishing. A "burr," as mentioned, is that small fold of metal that forms on the opposite side of the edge as you sharpen. It's a sign you've worked the edge enough on one side. Removing this burr is what truly finishes the sharpening process and makes the edge keen. Knowing these terms helps you follow instructions and understand what's happening as you sharpen your blades. For example, using the right grit stone is important for carbon steel knives.
Here's a quick look at some key terms:
- Apex: The very tip of the knife's edge where the bevels meet.
- Bevel: The angled surfaces that lead down to the apex.
- Burr: A thin, wire-like ridge of metal that forms on the opposite side of the edge during sharpening.
- Angle: The degree at which the knife meets the sharpening surface.
- Grit: A measure of the coarseness or fineness of a sharpening stone.
Sharpening is a skill that improves with practice. Don't get discouraged if your first few attempts aren't perfect. Focus on consistency and understanding the process, and you'll see improvement over time.
Selecting The Right Tools For The Job
Alright, so you've got the idea of why a sharp knife is a good thing. Now, let's talk about what you actually need to get that edge back. Picking the right gear makes a big difference, honestly. It's not just about having something sharp; it's about making the sharpening process easier and getting a better result.
Choosing Your Sharpening Stones
Sharpening stones, or whetstones, are the heart of manual sharpening. They come in different materials and grits, and knowing which to pick is key. Most people start with a combination stone, which has two grits – a coarser one for fixing up a dull or damaged edge, and a finer one for refining it.
- Water Stones: These are made from softer materials and need to be soaked in water before use. They cut fast and give a nice, sharp edge. Just remember to keep them flat!
- Oil Stones: These use oil as a lubricant. They're a bit harder than water stones and don't require soaking, but they can be a bit messier.
- Diamond Stones: These have a surface coated with diamond particles. They cut very quickly and don't need water or oil, but they can be more expensive.
When you're looking at grit, think about what you need. Lower grits (like 200-400) are for reshaping and fixing chips. Medium grits (600-1000) are for general sharpening. Higher grits (3000+) are for polishing and getting that super-fine edge.
The grit number tells you how many abrasive particles are in a square inch of the stone. More particles (higher number) mean a finer grit and a smoother finish. Fewer particles (lower number) mean a coarser grit for faster material removal.
The Role Of A Strop In Finishing
After you've worked your knife over the stones, there's often a tiny, almost invisible burr or rough edge left behind. That's where a strop comes in. Think of it as the final polish for your knife's edge.
A strop is usually a piece of leather, sometimes mounted on a flat board. You'll often apply a fine abrasive compound to the leather. When you drag the knife edge across the strop, it gently removes that burr and polishes the very apex of the edge, making it incredibly sharp and smooth.
- Leather Strops: The most common type, great for fine polishing.
- Stropping Compounds: These are pastes with very fine abrasives that load the leather.
- Technique: It's all about light pressure and maintaining that same angle you used on the stones.
Skipping the strop means you're leaving that little bit of roughness on the edge, and it won't stay sharp for as long.
Essential Lubricants For Sharpening
Using the right lubricant with your sharpening stones is pretty important. It does a few things: it helps wash away the metal particles that come off the blade, it keeps the stone from getting clogged up, and it can help cool the blade and stone.
- Water: For water stones, plain water is usually all you need. Some people use a bit of soap, but it's often not necessary.
- Honing Oil: For oil stones, a light honing oil is best. You don't need much, just enough to keep the surface wet.
- None: Diamond stones don't require a lubricant, though some people use water to keep dust down.
Using the wrong lubricant, or no lubricant at all when one is needed, can make your stones wear out faster and not perform as well. It can also make the sharpening process more difficult.
Mastering Whetstone Techniques
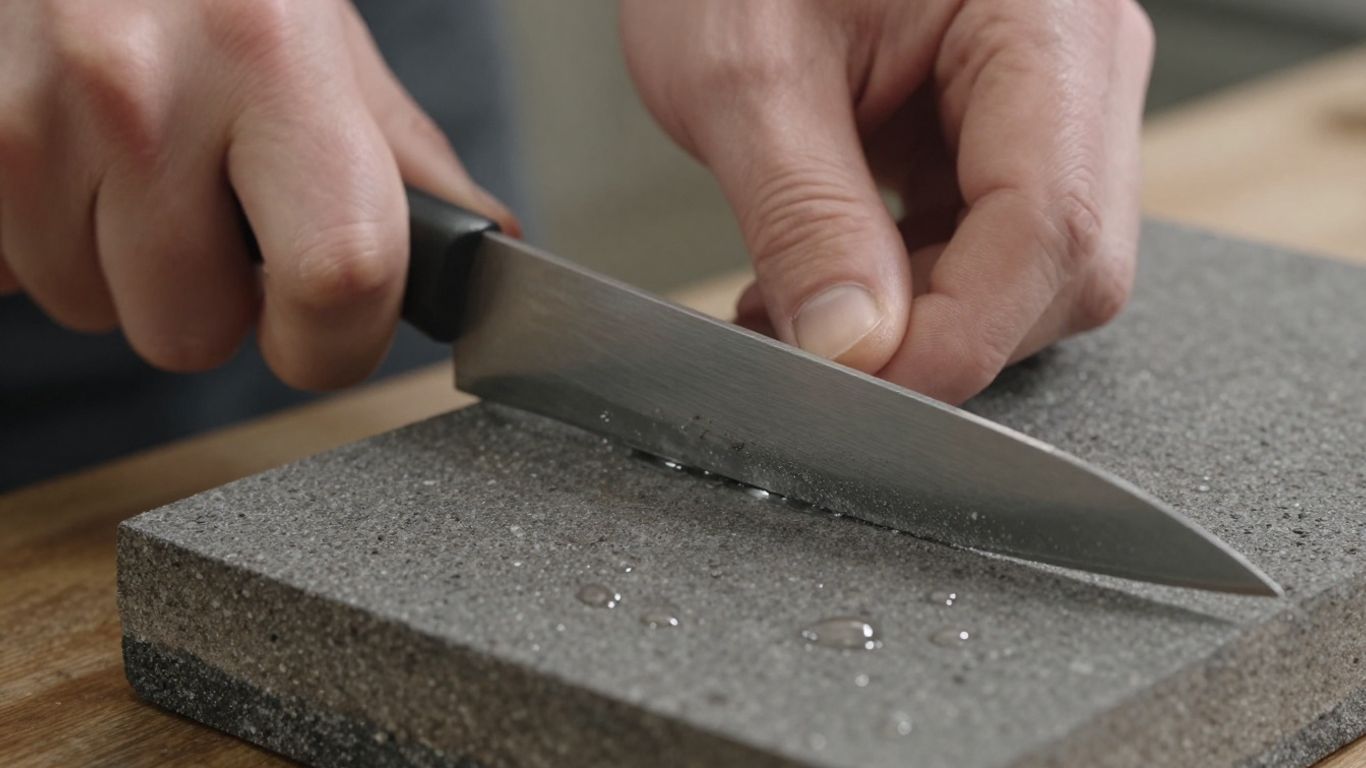
Preparing Your Whetstone For Use
Getting your whetstone ready is the first step to a good sharpening session. Most stones, especially the medium grit ones, need a good soak. Submerge them in water until the bubbles stop coming up. This usually takes about 10 to 15 minutes. It means the stone is fully hydrated and ready to work. Finer grit stones sometimes just need a splash of water on the surface to get going, but always check what your specific stone recommends.
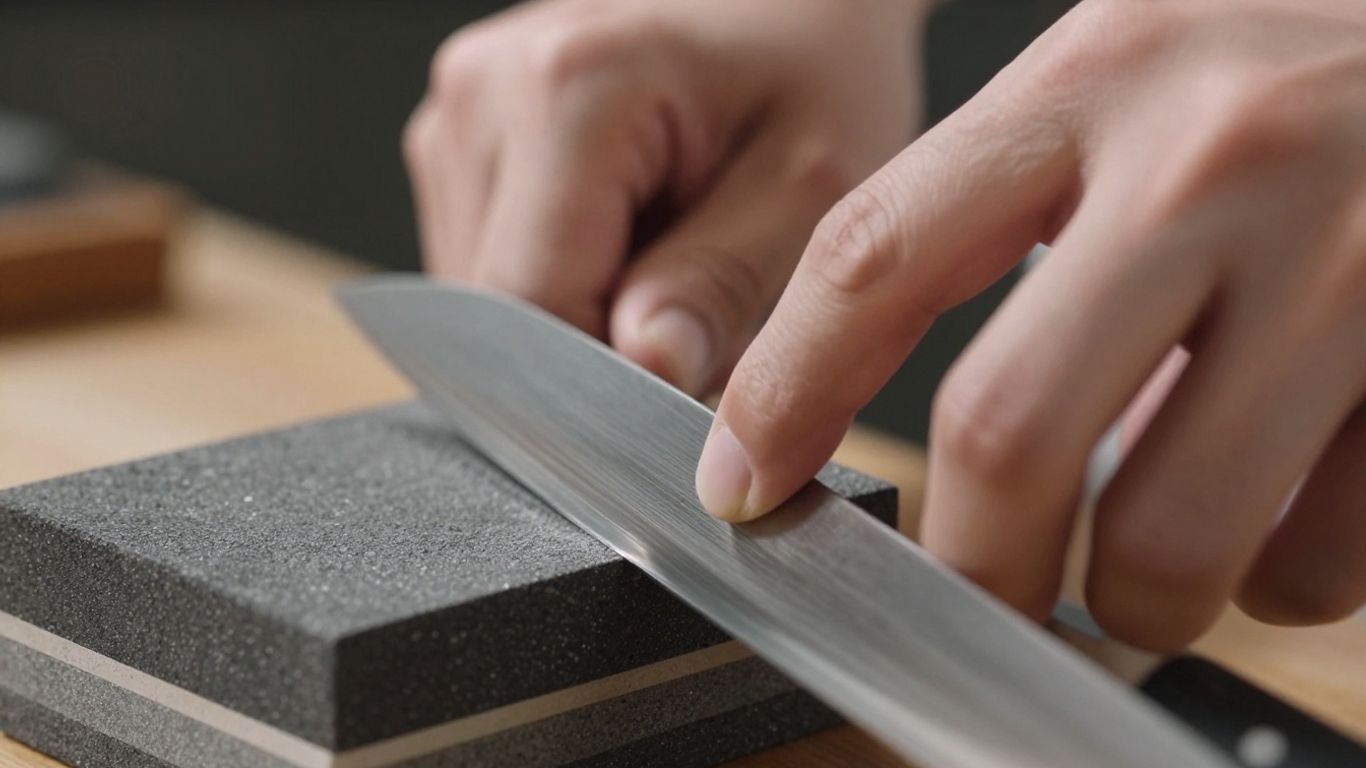
Finding And Maintaining The Correct Angle
This is probably the most important part. You want to keep the knife at a consistent angle against the stone. For most kitchen knives, this is somewhere between 15 and 20 degrees per side. Think of it like holding a pencil at a slight tilt. You can use little tricks to help you find the angle, like placing a few pennies under the spine of the knife to get a feel for it. The key is to keep that angle the same from the heel of the blade to the tip, all the way through your strokes. It takes practice, but it's worth it.
The Art Of Alternating Sides
Once you've got your angle and your stone is prepped, you start sharpening. You'll make a stroke with one side of the blade on the stone, then flip the knife and do the same on the other side. You want to do about the same number of strokes on each side. I usually aim for 10 to 15 passes per side to start. As you sharpen, you'll feel a little rough edge, called a burr, form on the opposite side of the blade. That's how you know you're making progress. You keep going back and forth, gradually reducing the burr until the edge feels smooth and sharp.
Here's a quick rundown of the process:
- Soak your whetstone (if needed) until the bubbling stops.
- Hold your knife at a steady angle, usually 15-20 degrees.
- Make smooth, even strokes across the stone, applying gentle pressure.
- Alternate sides, making roughly the same number of passes on each.
- Feel for a burr forming on the opposite side – this means it's working!
Keeping your pressure consistent is key. You don't need to press down super hard, especially on finer stones. Let the stone do the work. Too much pressure can actually damage the edge you're trying to create.
Achieving A Razor-Sharp Finish
So, you've worked through the sharpening stones, maybe even felt that little burr form and then disappear. Now comes the part where we really make that edge sing. This is where we go from 'sharp enough' to 'wow, that's sharp!'
Refining The Edge With Fine Grit Stones
After you've used your coarser stones to get the basic shape of the edge back, it's time to smooth things out. Think of it like sanding wood – you start rough and end with fine sandpaper. For knives, this means moving to stones with higher grit numbers. These stones remove less metal but polish the edge, making it much smoother and keener.
Start with a stone that's a step or two finer than what you used last. Keep that angle consistent, just like before. Make smooth, even strokes. You're not trying to remove much metal here; you're just refining what's already there. A few passes on each side should do it. The goal is to get rid of any tiny scratches left by the coarser stones.
The Importance Of Stropping For A Polished Edge
This is where the magic really happens for that last bit of sharpness. Stropping isn't really about removing metal; it's about aligning the very edge of the blade and polishing it. A leather strop is the most common tool for this. You can use it with or without a polishing compound.
When you strop, you're essentially dragging the very tip of the edge across the leather. This helps to straighten out any microscopic teeth or burrs that might still be clinging to the edge. It's like giving your knife a final buff. You'll want to use a very light touch here. Too much pressure can actually bend the edge over, which is the opposite of what you want.
- Light Pressure: Let the strop and compound do the work.
- Consistent Angle: Keep the same angle you used on the stones.
- Backwards Strokes: Usually, you'll move the knife away from the edge on the strop.
Testing Your Knife's Sharpness
Okay, the moment of truth. How do you know if you've actually got that razor edge? There are a few ways to check, and you don't need to be a pro to do them.
- The Paper Test: Grab a regular piece of paper. Hold it up and try to slice through it with your knife. A truly sharp knife will slice cleanly through the paper with very little effort, almost like it's cutting through air. If it tears or catches, you've still got some work to do.
- The Tomato Test: A ripe tomato is a great test subject. A sharp knife should slice through the skin and into the flesh without squishing the tomato. It should feel like the knife is doing all the work.
- The Arm Hair Test (Use Caution!): This is a more advanced test. If your knife is sharp enough, it can shave the hair off your arm. Be extremely careful if you try this, and only do it if you're confident in your sharpening. It's a good indicator, but not worth an injury.
Don't get discouraged if your first few attempts aren't perfect. Sharpening is a skill that gets better with practice. Pay attention to how the knife feels and cuts after each step, and you'll start to get a feel for it.
If you've gone through the fine stones and stropping and it's still not cutting like you expect, it might be time to revisit your angle or consider if you've fully removed the burr. Sometimes, just a few more passes on the finest stone or strop can make all the difference.
Maintaining Your Edge For Longevity
So, you've put in the work and achieved that satisfyingly sharp edge. Awesome! But that sharpness won't last forever on its own. Think of it like keeping a car running smoothly – regular upkeep makes a big difference. Let's talk about how to keep your knives in top shape so they're always ready when you need them.
Regular Honing Between Sharpening Sessions
Honing isn't sharpening, but it's super important for keeping that edge keen between actual sharpening sessions. What it does is realign the microscopic teeth on your blade that get bent out of shape during normal use. It's like straightening a tiny comb that's gotten all messed up.
- How often? For knives you use a lot, a quick hone every few uses is a good idea. For less-used knives, maybe once a month.
- What to use? A honing steel (the metal rod) is the classic tool. Ceramic rods work too and can do a bit more straightening.
- The technique: Hold the knife at the same angle you sharpened it at (usually around 15-20 degrees). Gently draw the blade down the steel, alternating sides. Don't press hard; it's about alignment, not grinding.
Honing is a maintenance task, not a repair job. It keeps a good edge good, but it can't fix a truly dull or damaged blade.
Proper Cleaning and Storage Practices
This might sound basic, but how you treat your knife after you use it and how you store it has a huge impact on its edge. Dishwashers are the enemy of sharp knives, plain and simple. The high heat, harsh detergents, and jostling around can dull the edge and even damage the blade over time. Plus, they can get knocked against other utensils, which is a recipe for nicks.
- Cleaning: Always wash your knives by hand with warm, soapy water right after you use them. A soft sponge is best. Rinse thoroughly and dry immediately with a clean towel. Don't let them air dry.
- Storage: Keep your blades protected. A knife block is great, or a magnetic strip on the wall works well too. If you use a drawer, consider a blade guard or a separate utensil organizer so the knives don't bang against each other. The goal is to keep the sharp edge from hitting anything when it's not in use.
Recognizing When to Seek Professional Help
Sometimes, no matter how much you hone or carefully sharpen, a knife just isn't performing like it should. This is when it's smart to know your limits and call in the pros.
- Major damage: If your knife has a significant chip, a bent tip, or a deep nick in the blade, it's probably beyond what a home sharpener can fix easily. A professional has the tools and skill to repair this.
- Very dull knives: If you've tried sharpening and it still won't cut properly, the edge might be too far gone, or you might be having trouble getting the angle right. A pro can get it back to a good working edge.
- Specialty knives: Some knives, like high-end Japanese blades or those with very specific grinds, can be tricky to sharpen. If you're not confident, it's better to let someone experienced handle it to avoid ruining an expensive tool.
Taking these steps will help your knives stay sharp and reliable for a long, long time. It's all about consistent care.
Keep That Edge Sharp!
So, there you have it. Sharpening your knives might seem like a chore at first, but once you get the hang of it, it’s actually pretty satisfying. You’ll notice a huge difference in how your knives perform, making everything from chopping veggies to breaking down cardboard boxes way easier and safer. Remember, it’s all about practice and paying attention to what the blade is telling you. Keep those stones wet, maintain your angle, and don't forget to strop. Your knives will thank you, and so will your hands.
Frequently Asked Questions
Why is it important to keep my knives sharp?
Sharp knives are actually safer than dull ones! When a knife is sharp, it cuts through food easily without slipping. This means you need less force, reducing the chance of accidents. Plus, sharp knives make food prep faster and more enjoyable.
What are the basic tools I need to start sharpening?
You don't need fancy equipment. A good starting point is a whetstone with two different grit sides (one for shaping, one for polishing) and a leather strop for a final polish. You'll also need water or oil, depending on your stone type, to keep it wet while you work.
How do I know what angle to hold my knife at when sharpening?
The angle depends on the knife, but a common range is between 15 to 20 degrees. Think of it like holding your knife at about the angle of two stacked quarters. Some knives, like Japanese ones, might use a sharper angle, while others, like Western-style knives, might use a slightly wider one.
What is a 'burr' and why do I need to remove it?
When you sharpen one side of the blade, a tiny bit of metal can curl over to the other side, creating a thin, wire-like edge called a burr. It's a sign you've sharpened enough. You need to remove this burr by sharpening the other side and then stropping, otherwise, your knife won't feel truly sharp and the edge won't last long.
How often should I sharpen my knife?
It depends on how much you use your knife and what you cut. For kitchen knives used daily, you might sharpen them every few weeks or months. A good way to tell is by testing its sharpness. You can also do light honing more often to keep the edge in good shape between full sharpenings.
When should I consider getting my knife professionally sharpened?
If your knife has big chips or damage on the blade that you can't fix with your stones, it's best to see a pro. Also, if you've been trying to sharpen it yourself for a long time and it's still not getting sharp, a professional can help.


